Sign up to receive a fortnightly email from say it with news and fresh designs

Showing posts with label Thoughts on business. Show all posts

Thursday, 4 June 2015

How to make more money from selling handmade products (part 3)

Here's part three of my series on ideas for making more money from selling handmade products. In part one I considered the impact of increasing your prices and in part two I thought about using higher quality materials. In this third part I'd like to share my thoughts on what happens when you reach your capacity and don't have any more time to give to the business. Is there a way to make more money from the hours you put in?


Part Three - Remember that your time is money

When I started my business I had plenty of time and very little money. If I could save a few pennies by doing something myself I would. For example I didn't buy board backed envelopes for posting out my cards, I used normal envelopes and cut sheets of recycled cardboard to size to stiffen the parcels and make sure the cards wouldn't get bent in the post. It was much cheaper this way as board backed envelopes are expensive, and my hand cut cardboard inserts did the job just as well.

This is sensible to start off with because you need to keep your costs low and sales are probably slow so you have the time. If I could save a few pence on each order by doing a little extra myself I'd have a bit more profit at the end of the week.

But then you start to get busier and you have a lot more orders to fulfill. Once you reach capacity and you are making as many products as you can your time is no longer a cheap resource. You don't want to spend time doing things that you could pay other people to do. Your unique talent is in making the handmade products so you want to spend as much of your time as possible doing this. Therefore it might become sensible to think about outsourcing where possible.

I'm not just talking about the big things. When I first read about outsourcing I thought it wasn't for me, because the articles were talking about hiring someone to run your social media channels or manage your marketing. And I'm just not at that point yet. But think about the really small things - is there anything that you spend time doing that you could pay for someone else to do and therefore have more time to make products? Switching over to using board backed envelopes was a good starting point for me! Yes it added about 12p to each order, but it saved me so much time. And when you are working at capacity you have to remember that your time is money. In the time I saved cutting up cardboard each week I could make up another journal for a customer.

To see if it's cost effective to 'outsource', work out how much time you could save. Then convert this into an hourly wage that you want to pay yourself and compare this to the extra price of paying someone else to do it for you. For example, if you want to pay yourself £10 per hour then every minute of your time is worth 17p. If you can save a minute of your time and it costs you less than 17p to do so you will be making more profit.

Here's the costings for my envelope example:


I now spend a lot more on packaging, but I have more time to make up orders so I'm bringing in more money each week. I'm ashamed to say it took me a long time to get this and my husband had to convince me it made financial sense (he's an accountant!). Doing things more cheaply by doing them yourself isn't always the best option.

Here's another example from my business. I use a lot of A4(ish) sheets of brown paper. I used to buy the brown paper in rolls as it was much cheaper, then cut it to size myself. Doesn't take long to do one or two and saves a few pence per item. But it takes ages when you're trying to do 20 at a time - time that could be spent making more products. Now I buy brown paper in A4 sheets so I don't need to cut it to size. It costs a little more but my time is more expensive, so overall it is cheaper.

Making your products is the skill that is unique to you - the skill you can really charge for. So what do you do that isn't making that you could outsource to someone else? Buy your business cards instead of printing and cutting them at home. Buy materials pre-cut to size. Buy gift boxes instead of wrapping things. Buy accounting software to keep track of sales. Save yourself some time and make a bit more money.


Thursday, 28 May 2015

How to make more money from selling handmade products (part 2)

I'm by no means an expert, but I love sharing what I've been learning on my journey of running a small handmade business. Recently I've been thinking a lot about how to make more profit and earn a little bit more money. You can catch up on part 1 here where I explored the impact of increasing the retail price of handmade products.


Part Two - Use higher quality materials

Depending on what products you make, it's likely that a large part of the cost of the finished item will be the time it took you to make. It might only have cost you a couple of pounds to buy the paper/wool/beads, but if it took you a while to make up the finished item (and you want to pay yourself a decent wage) it probably costs much more for your time.

For example, you might buy £5 of colourful beads and then spend 2 hours stitching them together into a beautiful necklace. If you want to pay yourself £10 an hour you've spent four times as much on your wages compared to the cost of the beads.

You could try speeding up the making process, looking for ways to be more efficient, but at the end of the day handmade items are made by hand and this will always take time.


To make more money from selling your handmade items you might have thought about spending less money on materials, but have you ever considered spending more? You can sell the same product at a much higher price point if you use more expensive, luxury materials, yet it takes the same amount of time to make.

Back to that beaded necklace example. What if you were to make a very similar necklace that still takes 2 hours to make, but this time you use more expensive beads. Perhaps you might add some swarovski crystals, or sterling silver elements. Let's say you spend four times as much on the beads, so that they now cost £20, but the necklace is worth a lot more so you could double the retail price.


Obviously this is over-simplified, but spending more money on the materials could actually help you to earn a better wage for the time you spend making.

It's a bit counter-intuitive, but imagine you wanted to buy a knitted blanket. How much would you be prepared to pay for a lovely handmade blanket made from cheap yarn? And how much would you pay for a similar blanket knitted from pure wool? Knitted blankets might take hours to knit. Made from cheap yarn it's just not that special, but made from pure wool it can reach a very high price point. Using higher quality materials may make it easier to charge a decent wage for your labour time.

Next week I'll finish the series by considering how you might make more money by paying other people to do things you could have done yourself, so make sure you pop back for part three.


Thursday, 21 May 2015

How to make more money from selling handmade products (part 1)

From time to time I like to share what I've learnt from setting up and running my little handmade business. I'm not an expert, but I might be able to help others who are a few steps behind me on the journey. Even if you aren't trying to sell handmade items, I hope you'll find it interesting to see what is involved behind the scenes - sadly I can't just sit here being creative all day long!

One of the things I've been thinking a lot about over the last year or so is how to make more money from what I do. I'd love to get to the point where I'm paid a decent wage for all the hours I put into my business. So I thought I'd share some of my thoughts over a mini series of 3 posts.

My starting point is a small business selling handmade products that has got established and found products that people want to pay good money for. But it's just not making sufficient profit. How can you start to make more money by selling your handmade products?

Part One - Increase your prices

The most valuable lesson I learnt about pricing was this:


I used to worry about putting my prices up because it may mean that less people would buy my work. And this bothered me. I didn't want less sales, I was trying to make more sales. Then I read the above, - and I wish I had noted which amazingly insightful person shared this valuable lesson so I could thank them. It's possible to make less sales but more money.

Lets think about an example. Say I sold hats for £8 each and sold 20 a month, then doubled the price to £16 but only sold 10 hats a month as less customers wanted to buy my expensive hats.


So my profit is higher, my costs are less AND I've only had to spend time making 10 hats rather than 20!

Therefore, put your prices up and don't worry about losing a few customers. You don't have to double your prices, the general rules will work even with a smaller price increase. If you sell your handmade products at a higher price, even if you get a few less customers, you could easily still make more money overall. Obviously there will be a point at which no-one wants to pay out such a high price tag and you lose all your customers, so it may take a little experimenting.

Justify the price increase

To help sell your products at a higher price point you might need to justify the price increase. Here are three ideas:

1. Sell your expertise.
If you have been running your business for a while and you  have made a lot of your products you are no longer an amateur just starting out, you are a skilled craftsman. Make sure your about page and product descriptions really sell this.

2. Smarten up your branding.
If you want to sell at professional prices you need to look professional. My sales really started taking off when I refreshed my branding a couple of years ago. I started to look like a proper shop.

3. Make sure your packaging reflects the quality of your product.
It might be ok to ship a cheap item in a recycled envelope, but if your customer has paid a lot of money they may be a little disappointed (unless recycled packaging is part of your brand). Think carefully about how you present your item to the customer. Does it need a packet, tag or belly wrap? Will you gift wrap it? What sort of packaging will it be shipped in? Make sure everything is consistent and well branded and your (now a little bit expensive) product will feel worth the money.


Parts two and three are now available:
Part two - make more money by using higher quality materials
Part three - remember that your time is money

Thursday, 19 February 2015

Improving my product photography

Each year I like to have one area of my business to focus on improving. I'm very aware that there is loads that could be done to make my little business better, but if I try to do them all at once it becomes so overwhelming and time consuming. Since I spend most of my working time making up orders (as this is what brings the pennies in afterall) I only have a couple of hours a month that I can use for making improvements. Now that I've got my business up and running and (hopefully) looking pretty professional there's no rush to improve everything at once. So I like to pick one main area at the start of the year that I'll invest time in.

This year it's my product photography. I keep all my photos pretty plain and easy, with a standard white background. A couple of years ago when I last looked at my product photos I put a lot of effort into making sure the backgrounds really were nice and bright white, rather than greyish or blueish depending on the light. However, I did this mainly by editing the photos after taking them. It seemed to be taking a disproportionately long time to get good product photos, so I thought it was about time to think about how I could improve the original shot so that it needed less editing.

After quite a lot of reading I felt that I could change two things relatively easily: the background and lighting. So I've built myself a new white backdrop that I can simply place my products onto.


It's just a piece of very thick cardboard stuck at right angles, with a large sheet of white card attached at the top. Nothing fancy here!


But it's great and making a huge difference so far. It's portable, so I can move it around the house depending on where the light is. And it's large enough that I can get a good shot of my product wholly within the white backdrop. So no more editing out joins in the card or the bits round the edges where the background wasn't quite big enough. Here it is all set up with my mini tripod.


Next up I need to work on the lighting. I've partly solved it by being able to move the set up to the lightest part of the house depending on the time of day. But each time I need to take some product photos I'm going to have a little play and see what else I can do.

Tuesday, 29 July 2014

Is it worth paying for advertising?

I've not written a businessy-type blog post for ages. I guess that's because the rate at which I'm learning things (and therefore have new things to share) is slowing down now my business is more established. I've been thinking about advertising again recently though, so thought I'd share my thoughts.

If you run a small business or sell your handmade products this is probably a question you've asked yourself at some point - is it worth paying for advertising? Or, more precisely, is it worth paying for this particular bit of advertising that I'm considering?

Until you have tried a particular channel of advertising it is very hard to know if it will bring you any additional sales. This is something that I have learnt to accept. Sometimes you just have to spend a little bit of money to try things out, and then change track if it's not working. But I like to at least be able to evaluate an advertising opportunity and see if I think it might be worth it financially.

So I thought I'd share how I consider a paid advertising channel. This is just really from a financial perspective - of course you will also need to think about whether the advertising will reach your target customer and is in line with your brand.


I hope that's helpful. Sometimes this helps me see that I should definitely pay for a piece of advertising, and other times it helps me realise that I would never make my money back. A very tempting advertising offer can suddenly seem not so appealing when you work out how many items you would have to sell to make it worth while!

You can use this method for free advertising too, by converting your time into a financial cost. If it will take you an hour a week to maintain a certain advertising channel, change this into a monetary cost by using the hourly wage you want to be paid. Then you can use the above calculation to see if it's worth the time investment.


Wednesday, 21 August 2013

Top tips for selling on Folksy


Are you thinking about starting a little shop on Folksy to sell some of your handmade creations? Or perhaps you've been selling online for a while but would like more sales? Follow these top tips for selling on Folksy and you'll have your shop looking top notch in no time (they probably work for other online sales venues too, like Etsy).

Over the past year I've been interviewing Folksy sellers and nearly 100 shops have taken part - you can see all the interviews here. One of the questions I asked was 'what is your top tip for selling on Folksy?'. There's a great wealth of experience and wisdom shared in those answers, so I have collated some of my favourite answers. Here are the top tips for selling on Folksy, from those who are doing it.

1. "Take good photos, it really does make or break your appeal to customers." Helen from A Farmer's Daughter. Dawn from Audrey's Cat adds "Work on your photos and then work on them again and then work on them a bit more!" Jo from JoSara has some great advice for improving your photos:

"Your item photo is the first thing a customer will see of your shop on a page of other search results, so it needs to grab their attention and entice them in to find out more. If dull light is a problem, make a small investment in a photo tent and a couple of daylight lamps to brighten the items up. If it’s difficult to get a clean, bright background, try fotofuze.com, which will magically transform the background for you. Another tip is to make use of the Macro facility on your camera. You don’t need a flashy camera to get great close ups, just find out how to change the camera setting to Macro (the tulip flower icon) and you’ll have pin sharp images. Lastly, make sure to use all 5 photo spaces in your Folksy listing to show the whole of the item (on all sides if it’s got a pattern, or detail that you can’t see in one go), show close ups on any important details (try using some arty camera angles to get some interesting close ups), and you could put the item into context, too, i.e. if it’s a bracelet, show it on a real arm. Imagine you are your customer. What would you look at on your item? What would you want to have a closer look at? You have to be the eyes and hands of your customer via your pictures."

2. "Be active on social media," says Lesley from Phoebe Dreams. "I find that linking items from my Facebook page brings in lots of extra traffic, and quite often sales too." Sam from Pants and Paper agrees, "My best promotional tool at the moment is Facebook. I have made a real effort lately to try and spend more time there and it has paid off, with most of my viewings/sales coming via my page."

3. Josiane from Wee Peoples recommends getting involved in the Folksy Forums - "I receive a lot of orders from other makers and the forum provides an opportunity to introduce yourself and your work."

4. "Have a strong identity and brand" says Heather from Popsey. "Being consistent with photographs and products strengthens your presence online". Jenny from Little Red Robin says "make sure your shop banner matches colours in the packaging you have and business cards".

5. "Put as much effort into how your shop looks as you do in making your items," advises Tracy from Cinnamon Jewellery.  "Write a profile – buyers like to know a bit about who they're buying from. A well presented shop reassures buyers you care."
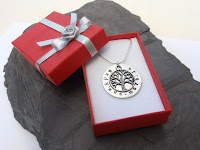
6. Work on your titles. Anna from Anna King Jewellery says, "The majority of my customers are new to Folksy. I like to think that they find me through search engines. Having descriptive titles and putting the important information at the beginning of your descriptions can really help with visibility in searches." Andrew from Bright Stem adds, "Think about what customers might type in to find your products. It takes time and requires research but is definitely the cheapest way of attracting customers."

7. "Promote promote promote and then promote some more" urges Teresa from Creative Treasures. Emma from Ritzy Swish recommends using Stumbleupon, Twitter and Craftjuice.

8. "Customers can't pick up and feel your items so you need to give them plenty of information," say Catherine and Jennifer from Daisy Beth. "Make your descriptions as detailed as possible including materials, dimensions, colours etc. It helps to imagine they can't see the item you're describing."

9. Ali from Very Berry Fabrics suggests writing a blog. "I get the most traffic when I feature new additions to the shop on my own blog, veryberryhandmade.co.uk. I have worked really hard on getting regular traffic to my blog (I average 20,000 hits a week), and I take advantage of their good nature now and again by shamelessly promoting my lovely fabrics." 

10. And my top tip for selling on Folksy is make sure you're charging enough for your items. There's no point selling 10 items if you actually don't make any profit on them. Work out what it costs you to make and sell them (including materials, your time and selling fees) and make sure you add a price tag that is larger than that. You may find that charging more for your items means you sell more too. It sounds a bit odd, but customers can be suspicious of items that are too cheap and wonder how well they have been made. My advice is to charge a little bit more than you would be happy to pay.


Tuesday, 12 February 2013

Photographing your handmade items: part 3

If you've missed the first two parts to this series, find out about setting up your product photo here and taking your photo here. In this final blog post, we're going to think about editing your photos so that they sell your items as well as possible.


Load the pictures from your camera onto your computer and sort them out into folders, one for each product. Go through the photos for each item and select the photos that you think are best. Make sure they are in focus, and choose a range of photos so that you have at least one that shows the whole product and one or more close up shots where the detail is clear.


Open up the photos you have selected in a photo editing programme. There are many different ones you could use, don't feel you have to splash out on photoshop (although an older version of photoshop elements can be pretty cheap and will have more tools than you could possibly need). If you don't already have any photo editing software on your computer, try an online version for free - PicMonkey and iPiccy are two popular ones.

The first two things to do are crop and brighten the picture. If you don't do anything else it is definitely worth spending a minute or two on these. First, trim the photo to the size and shape you need. Does it need to be square for example? Then brighten your picture a little. No matter how hard you try to get good lighting when taking the photos they will probably still look a little bit dull, and increasing the brightness can make a big difference to how your product looks.

Compare these two photos for example. The first one is the original and the one underneath has been brightened up.

Original photo - bit dark
Brightened photo - looks much better

Tracy from Cinnamon Jewellery always makes these two adjustments to her product photos. She says:

"I always edit my photos with Paint Shop Pro. Usually it's just a slight tweak of the contrast/brightness settings. This will lighten the photo and add depth. I sometimes edit the colour if it looks duller than it should but it's important not to get carried away and end up with the colour looking too bright for obvious reasons! I then crop my photos square. I crop fairly close to the item so it's the main focus of the photo. Experimenting with how you crop is worth doing too – how you crop alters the position of the item within the photo and can make it really stand out if done right."


That may be all the editing you need to do to your photo. If you're happy with it go ahead and save it. But a few more tweaks that you might like to consider are:
  • Adjusting the colour balance - especially if you have any white areas that look a little blue.
  • Editing out any flaws - for example you may have a mark on your background that you want to erase.
  • Making sure your background goes right to the edge of your photo - you can fill in any gaps with the same colour. It doesn't look very professional to try taking your photos on a coloured piece of card, but in one corner the card runs out and you can see the table underneath. If you didn't intend it to be there, get rid of it. 
  • Lighten dark shadows - if you think the shadows have come out a bit dark you could lighten these.
  • Sharpen the image - if your best photo is still a little out of focus see if this adjustment helps.

Victoria from Little Wren Pottery adds her top tips for editing your product photos:

"Once I've taken a set of photos I try and select a few complimentary shots. Each photo gets edited in Photoshop. I use the auto contrast first, then adjust the levels manually by eye. I don't think that automatic functions are a replacement for the human touch! Sometimes I adjust a photo's colour balance as well if its looking too blue or too yellow dependent on the light you get on any given day."


In this photo for example I needed to get rid of my thumb and the gap at the edge of the background, making sure the white background went right to the edges of my picture. I also adjusted the colour balance because it looked a bit blue, as well as brightening it all up a bit. You can see the difference with the photo underneath. 

Edit that thumb out!
Nothing to distract from my notebook now

To find out how to make any of these adjustments, do a google search for the photo editor you are using, there are loads of helpful tutorials online. 


If you are using a white background try and make sure it is really white. It might look white, but when you put it against a white background it will look dull if it's not pure white. Here are two ways I use to make my product pictures have perfectly white backgrounds:

Increasing brightness
Increase the brightness of the background only. You can do this by creating an adjustment layer in photoshop and filling in the shape of your product in black so that the brightness is only applied to the background and not the product.

How to give your product a white background in photoshop elements
In the layers palette click on the little half black half white circle and select brightness/contrast from the drop down menu. Then increase the brightness, concentrating on making the background nice and white without losing all shadows (don't worry about fading your item).


Then colour in the shape of your item in black and it won't apply the brightness adjustment to this shape. This method works best for products with a simple outline, such as cards, which can be easily traced.


Using the dodge tool
The dodge tool is great for coloured items. Use the highlights mode, and around 20% exposure. Simply colour over the areas you want to be white, and it should make the white bits whiter whilst leaving the coloured areas as they are. There is also a dodge tool on ipiccy that you can use for free.

Using the dodge tool in photoshop elements


Do you have more photo editing tips? Please share them in the comments below this post. There are probably hundreds of great fixes that you can apply to make your photos stand out, but I hope these few tips have been helpful to start you off.

A huge thank you to my fellow Folksy sellers who have helped me out with this series of posts.


Friday, 8 February 2013

Photographing your handmade items: part 2

Welcome to part 2 of photographing your handmade items. If you missed part 1 earlier this week, why not pop over there now for help with setting up your shot and styling your photos the way you want them.

Now we're going to think about actually taking the photo.


Get your camera out. You don't need a super dupa mega fancy camera, but I will say that a phone/tablet camera probably won't be sufficient. You'll need something with a few settings, but my very basic camera that I've had for years has everything I need. You don't need millions of megapixels either. The minimum is probably about 5 megapixels, which will give you good shots for your online shop. But you'll need a few more if you want to take hi res shots (required for magazines etc.).


Think about lighting. Take a walk around your house and find the room with the most natural light. Set up near a window, out of direct sunlight. Two rules - no artificial lights and absolutely no flash. Don't worry if it looks a little dull, it's amazing what you can do with a computer afterwards. I know a lot of people advise using a light tent if you want shots with a white background, but I've never used one and they're certainly not necessary.

Now take a look at your item set up waiting to be photographed and notice the shadows. Which way do they fall? How big are they? A little bit of shadow helps to give depth to the picture, but you really don't want too much. Great big shadows that are larger and darker than the product just detract from what you're trying to sell. Shadows aren't something we normally notice, but take a good look at them now. And move your item around until you are happy.


Hold your camera in place for the shot, then take a look at how close the lens is to your item. For large items you are likely to be a fair distance away, but for smaller items or close up shots you might only be a few centimeters from the product. These close up shots are likely to be out of focus unless you use your camera's macro settings.

Tracy from Cinnamon Jewellery explains:

"Taking photos of jewellery means you have to get close up in order to show details so using the macro setting on your camera is essential. It's usually the button with the tulip symbol and will focus on small details when the camera is close to the item. My camera allows me to get very close to items, within 2 inches, so I can pick out a particular detail I want to show. It's worth reading your camera manual and experimenting with settings to get the best results. I found experimenting with the manual settings on my camera produced better all round results than using the auto setting."


Lastly, you want to make sure your camera doesn't move when you take the photo. Any movement, no matter how small, will make the photo look blurry and out of focus. It's important to have sharp product pictures so you need to fix the camera in place. If you have a tripod this is perfect. I have a mini tabletop one that I find quite useful. But you can achieve the same thing by sitting your camera on top of a couple of books. Just make sure that it is sat somewhere quite stable and not wobbling about in your hands.

If you've done this and you're still getting a little bit of blur, especially on the macro setting, then you could also try using the automatic timer setting so that you make sure you're not moving the camera when you press the button to take the photo.


Don't worry too much at this stage about what the photo looks like. This is one of my pictures that I still managed to turn into a decent product image:


If you're using a white background just make sure there is white all the way around the edge of the product. After that, anything else in the background (such as my craft mat and computer speakers!) can be edited out afterwards.

And speaking of editing, the third post in this series on photography looks at taking the raw images and using your computer to turn them into something beautiful.


Wednesday, 6 February 2013

Photographing your handmade items: part 1

I hope you'll agree that the photos I shared with you in last week's post show a huge improvement from when I first started my little shop to my current product photos. They're not perfect and I still have a lot to learn, but they're better than they were and I'd like to encourage you that it's not too hard to make massive improvements to your photos.

The first thing to think about is setting up your shot. What do you want your product photo to look like? What type of background would you like? And do you want to use any props to enhance your product?


Search for other products that are similar to yours, both on handmade sites and high-street shops. Pick out the photos that you like and note what it is about them that you are drawn to.

Good use of colour
Nice white background
Coordinating props


Decide on the type of background you want to use. Will you go for studio style shots with white backgrounds, model your items on real people or use props to enhance your products?

Jenny from Little Red Robin photographs her handmade jewellery and keepsakes on a slate background. Jenny says:


"I chose slate for the background of most of my images as it shows up silver well against that background. Originally I used a white background and its quite clinical looking. Another reason is that using slate is quite organic looking and we feel our shop products are rustic and organic too so use of slate goes with our products."


It's important to choose a background and photo style that matches your products. Victoria from Little Wren Pottery takes some very impressive lifestyle shots of her contemporary dinnerware. I asked her about her photos.


"I've tried all sorts with photos; white backgrounds, black backgrounds, light boxes. It's important to find a style that's comfortable for you to shoot in and get good results. I tend to think photos should have character and reflect something of your product regardless of what you sell. For me lifestyle photos are just more interesting to look at. I think having good photos makes you stand out from everyone else and it's how your customers experience your products without being able to touch them."


If you decide, like me, that a white background suits your products and looks most professional then simply place your items on a white piece of card (or two - don't worry about joins, these can be edited out later). This is what my set up looks like:


Think about the angle that you could take the photo from. Square on photos often don't show enough depth, so consider taking the shot slightly from one side. Similarly, compare these two photos and note how the angle of the shot changes the overall effect of the photo. Everything else stayed the same, I just moved my camera.


Try to get a consistent look for all your shop photos. So if you go for a plain white background, you should have all your main product photos white. Or if you choose a lifestyle shot modelling the item you need to think how you can do this for all your items. Use the same lighting and the same angles to take similar shots of each of your products. Of course, you will want to have additional pictures of each item which could be different, but to keep a consistent look to your shop take your main product photos in the same way.

Take a look at the Little Red Robin shop on Folksy. Notice how nearly all the pictures have the same slate background to tie them all together and they look like a cohesive set of product images. Jenny says:


 "The consistency of photos generally is that I take photos in my conservatory where there is better light, use the same background, same zoom and macro settings each time. Sometimes I try to use red jewellery boxes so people get an idea of how their gift will arrive too, or hold jewellery in my hand with slate in the background so they get an idea of size of an item as people don't always equate dimensions to the correct size."


I hope that's helpful. Have a play around until you come up with a shot that you are happy with. And if you have any tips about setting up a good product photo please share them in the comments.

Now pop over to Part 2: Taking the photo, where we have a think about cameras, lighting, tripods and macro settings.


Wednesday, 30 January 2013

Photographing your handmade items

As I learn about different aspects of making and selling and running a little craft business I like to share what I have discovered. I don't feel I've mastered any of these topics, but I know there must be people who are one or two steps behind me for whom the information will be useful. You can see previous posts on such things as pricing, branding and advertising here.

For my next challenge, I have been attempting to get my head around photography. This has been quite a steep learning curve. When I first started out nearly 18 months ago I put all my time and effort into making the items, then just took a quick photo wherever I happened to be at the time and stuck it up on my Folksy shop. I cringe as I look back and see the photos I was using to 'sell' my items.

The first photos I took of my handmade items


Wooden floors, my desk, stripy rugs and coloured folders all appear in the backgrounds. The photos were often out of focus and dark, and really did not represent my items at their best. It didn't take me long to agree with what I was reading on other blogs and handmade sites - the customer only has a few photos to get a feel for the product as they cannot pick it up and hold it in their hands, therefore these photos are the key to selling your item. I knew I needed to make my photos as good as I could.

So ever since then I've been learning everything I can about what my photos need to look like and how to take them. I am definitely not an expert, but I have picked up some tips that are worth sharing. I think there are three stages to getting good photos:

  1. Setting up the shot
  2. Taking the photo
  3. Editing the image

With the help of some fellow Folksy sellers, I will share with you how you can do the best you can at each of these stages. And without any fancy equipment, expensive cameras or professional training, I hope to encourage you that you can take very good photos that will do your handmade items justice. 

Click on each stage above to read the blog posts. 

My new and improved product photos

Monday, 17 September 2012

What is success for you?

Have you ever stopped to think about where you want to end up? You've started up a little business, worked really hard at it, seen it growing from strength to strength... But do you know where you're trying to get to? What does success look like for you? Will you ever stop trying to grow your business?

Maybe that's a bit of a controversial thing to say?! Most businesses seem to want to grow and grow and grow - and they won't stop until they've taken over the world. Bigger tends to be seen as better. But in the handmade marketplace, is there a point at which bigger isn't better?

Once you get over a certain number of orders per week, it won't be possible for you to fulfill them all yourself. By necessity, you would need to employ others to help with the business, or you would need to modify your products so that they can be produced faster. But does employing others change the personal identity of your brand? If your brand is you and one of your selling points is the personal contact that customers have with the maker, then this will radically change if you need the help of others to fulfill orders. If you decide to stick with your one man band, what will this mean for the production of your products? Often card makers have to stop making each card by hand, and turn to a print and then hand embellish production line. But is this where you want to go with your business?

At this point you might be thinking, yes, that's what I want. For me to be successful means growing the business beyond what I am capable of on my own. That's great. There seems to be plenty of advice out there on the net about how to achieve this and motivating success stories to keep you going. If this is what you want, don't settle for less.

But I know that success for me is much smaller than this. I didn't set out to take over the world. I wanted to make a little bit of money to add to our family income. I didn't really think about how much, just some more than what we had would be nice. And I knew that I wanted to be able to manage the business on about 20 hours a week. Any more than this and it would start interfering with family life, which I wanted to remain the priority.

Now, I've still got plenty of room to grow within these parameters. At the moment, my 20 hours a week seem to be filled too much with advertising and not enough with fulfilling orders. So I want to continue to grow until I have a steady stream of buyers and need to go to the post office every day rather than every week. But I know that I don't want to grow so much that I have more parcels than I can carry to take to the post office every day!

Can I encourage you to think about your goals and any parameters you want to set for your business. Maybe success is actually getting a few customers - people who actually want to spend their hard earned cash buying your work! Maybe success looks like a busy online shop, with increasing page views. Perhaps you want to get your items stocked in a few shops. Perhaps it needs to be 'certain' shops before you're satisfied (dreaming of Harrods?!). Once you've set some goals that you'd like to achieve, take a step back and think about what your job would look like if you achieved them. Would you have enough orders to make the income you desire? Or would you have too many orders that you'd be stressed out trying to complete?

Allow your dreams to flourish, but prune them occasionally too.

Friday, 27 July 2012

Advertising your handmade items - 10 weeks on

At the end of April I wrote a post about some research I had done on promoting your handmade crafts. You can see the post here. It was a summary of lots of different things you can do to advertise your shop or website, including social media, forums and directories. I was amazed by the number of different ways there are to get your products seen by potential customers.

As promised, I'm back to let you know which of these many ideas have been most successful. For the last 10 weeks I've been monitoring how much traffic each method of promotion has brought to my blog and / or shop.

Here's a summary of the figures:

Folksy shop

Site Average no. of views /week Average time spent on the site
Facebook 14.3 04:48
My blog 10.8 07:06
Other people's blogs
- leaving comments or being featured
3.4 08:48
Folksy Forums 35 03:48
Craft Juice 7.2 06:24
The Crafty Network 1.5 05:03
Handmade Crafts Directory 1 05:42
Heart Handmade 2.4 14:31
Free Ads 0.1 02:56
Stall Holder 0.25 02:16
CraftFest / Creative Connections 2.1 16:30
Made it Flaunt it
- during month of showcase
2.5 00:20


Blog

Site Average no. of views /week Average time spent on the site
Facebook 11.2 02:36
Other people's blogs
- leaving comments or being featured
0.8 02:06
Folksy Forums 38.9 01:16
The Crafty Network 0.83 02:01
Heart Handmade 1.1 03:51
UK Craft Blog 1.7 00:30
CraftFest / Creative Connections 3.25 06:19
Blog Rings 4.8 01:40
Link Parties 3.1 04:12


Number one tip for advertising: Use the forums for the selling site you use. As you can see, the Folksy forums bring the most visitors to both my shop and my blog, by quite a long way.

Number two: Get in on the social media action. Facebook comes second for both the shop and the blog. I believe that Twitter and Pinterest are also very good at bringing traffic, but I have only just started using these so I've not included them as it's not a fair comparison.

Number three: Start a blog and update it regularly. My blog gets quite a lot of traffic, and from the numbers above I can see that some of it makes its way across to my shop. These people are already interested in what I do, and tend to spend quite a while browsing my shop.

Number four: Sign up to Craftjuice. It's free promotion and it works.

Number five: Link your blog up to some link parties or blog rings. It generates a bit of extra traffic. I've only used one link party and one blog ring, but if you were to sign up to four or five you could potentially bring in a lot more visitors than the figures above suggest.

Number six: Network. Join other forums. Leave comments on blogs you follow. Interact with people on Facebook and Twitter. Swap blog buttons. Look out for bloggers who do regular features of handmade makers and put yourself forward. As they say, it's often about who you know.

Number seven: If you have time sign up to craft directories and blog directories. These tend to bring quite a bit of traffic to begin with, especially if the latest additions to the directory are at the top, but it trails off over time. It's not going to bring you the most visitors, but who wouldn't say no to an extra one or two for free.

Please note that this research was only done over a 10 week period, and I wasn't consistently putting the same effort into all the above. It's probably fairly obvious, but it looks like you get the rewards where you put the work in. And this wasn't a comprehensive search, so I've probably missed some excellent advertising sites. Please let me know your favourites in the comments!

Friday, 29 June 2012

Pricing for a profit

Since I started say it in September, it's been a steep learning curve. And as I learn about different aspects of running a business I like to share them, just in case it will be of use to you too. Something I've been thinking quite a bit about recently is pricing. I'm trying to make money so I want my prices to be high enough to bring in a profit, but if I price items too high they won't sell. I'm sure everyone who tries to sell their handmade items struggles with this at some point.

I've done a fair bit of reading and digesting what others have to say. There's quite a lot of helpful information out there when you start to look. There's an interesting blog post and discussion on The Crafty Network about pricing your crafts that's well worth a read.

It seems that there are three main ways that people work out what price to charge for an item:

1. Research how much similar items sell for and price it within that range
2. Decide how much you would be prepared to pay for your item
3. Work out the cost of the materials used, plus an hourly 'wage' for your efforts

The problem with options 1 and 2 is that often the price that seems reasonable doesn't take into account the cost of the materials or the amount of time that the product has taken to make. Many artists/crafters/designer-makers tend to end up under-pricing their work this way. It's not too much of a problem if you're not aiming to make much of a profit or bring in an income, but it's not a business mindset.

When option 3 is used, the calculated sale price for the item can end up so high that you just laugh at it. This is particularly the case for crafts that take a long time. If you made a crochet blanket and the wool cost you £15 and it took you 5 hours to make (I have no idea if this is realistic, I don't crochet this is just an example!) you might calculate the final price to be £15 + 5 x £6.08 (the current minimum wage) = £45.40. But then you think to yourself £45.40! No-one's going to pay that for a little blanket!

The common element to all three options for pricing your items is that they begin with the finished product. You've made a lovely bag/card/cushion/bowl and now you'd like to sell it. I want to suggest that this is possibly a backwards way of doing it, particularly if you are trying to run a business and make a profit. Perhaps you should start with what you think is a reasonable price for your idea for what you would like to make. Then think about how much you could afford to spend on materials, and, pricing your time, how many minutes you can afford to spend making it. Nine times out of ten you'll probably work out that you can't make the item quickly enough, or you can't buy the materials cheap enough, to be able to make a profit. This is why I advise thinking about your pricing before you get out your sewing machine/craft knife/knitting needles.

For example, I make cards. I think they are lovely cards but realistically no-one is going to pay £5.99 for them. So I choose to price the majority of my cards at £2.20. It costs me approximately 62p to sell each card online. So I have £1.58 left to play with. My time costs me 51p for every five minutes I spend making (at the minimum wage), so if the card took 15 minutes that would be all of the money spent. I need to allow a little for materials. So, realistically, if I can't make the card in under 10 minutes and using resources that cost less than 56p, it's not worth making unless I am prepared to charge more for the finished product. And that's not taking into account any time I spend advertising the product, packaging it and taking it to the post office - you may also want to factor this in.

Think about the costs first, not last. If you want to run a business that makes money, design products that you know are going to bring in a profit (of course, there's also the small matter about actually finding people to buy them...!). Think about the margins before you start splashing out on those amazing buttons/fabrics/stamps. Buy them for yourself because you like them, but don't buy them with your business hat on unless you've worked out that you can afford them. I have lots of card designs that I make because I like making cards. They take me way longer than 10 minutes, and use lovely materials that aren't cost effective. These are the cards that I keep for myself to give to friends and family - they might be nice, but they won't bring in a profit so they're not headed for my shop.

Monday, 30 April 2012

Advertising my handmade shop

How do people know I'm here? How do they find my shop? I know that people will only purchase my handmade items if they somehow find their way into my little tiny section on Folksy. A few people may stumble across it by accident or come through the Folksy search function, but on the whole people won't know about my shop unless I tell them.

So I've spent the last month researching advertising. I've emailed people, joined up to new sites and been uploading pictures. And I thought you may be interested in the types of advertising I've found. Warning: I discovered lots of interesting sites, so this is quite a long post!

Social Networking
Everyone talks about Facebook, Twitter, Pinterest, Stumbleupon etc etc. so I'll not say much, but it's definitely worth using at least one of these - just make sure you include good links to your shop. Facebook is one of my biggest sources of traffic.

Blogging
Blogs are a great way of being able to say more about what you do. I like the freedom of being able to write about whatever I want. Make sure you add a followers button and/or an option to sign up to follow by email, so that people are notified when you write a new post. And include a big fat visible link to your shop.
Also, commenting on other people's blogs is a great way of networking. I've found they often come over and take a peek at my blog just to see who it is who's left a comment. I have a new rule that I'm not allowed to read three blog posts without commenting on at least one of them. And as a blogger, it's so encouraging to know that someone stopped by to read what you write.

Forums
I'm not a forum person. I don't think I ever commented on a Forum in my life before I set up say it. I don't mind reading them, but I never really thought about contributing. Now I post in Forums almost every day. The first obvious one is the forum for the site you sell through (Folksy forums are great, so friendly). Then have a look out for other handmade / craft websites that have a community of sellers - UK Handmade and Creative Connections are good places to start.

Craftjuice
Add a link to an item in your shop then get others to vote for you. If you get to five votes, they post your item on their facebook page. But don't stop voting - the top voted items in the month get featured in a monthly email. It's really easy to use and is a simple bit of extra free advertising. Can I encourage you to sign up to Craftjuice and get started. Then visit the 'craft talk' thread in the Folksy forums and add your item to the Craftjuice topic - we all vote for each other :-)

Craft Directories
There are several sites / blogs that include a directory of makers, designers, handmade shops and crafty blogs. Many of these will add you for free. So far I have discovered The Crafty Network, Handmade Crafts Directory, Crafty Bitz, and UK Craft Blog, but there are probably many more. If it's free you may as well get yourself listed, it only takes a few minutes.

Non-craft advertising sites
It's good sometimes to venture outside our safe craft bubble, because most of our customers will probably be out there in the world and may not know to look on specific sites for handmade goodies. This is a little bit trial and error, but I have found that Freeads is quite good and brings a little bit of traffic to my shop. It also gives you quite good google search ratings. It takes a while to upload photos, but you get a free advert so can't really complain!

Virtual shop fronts / interactive advertising
The latest additions to my advertising are sites that offer you a shop front, but that link through to your existing shop (on Folksy or wherever) if someone wants to buy something. See my sale is a new site that's only just opened, but looks promising. It's not just for handmade crafts, so again helps to branch out and reach different people. Stallholder looks like another valuable site. I've only just signed up and I'm still figuring out how it works, but essentially it looks like a shop front that links to your own site when someone clicks 'buy now'. And if you have a spare fiver, Craftfest is an online craft fair event (the next one runs for a week in June) - sign up and get your own virtual table which you can add your products to.

Get yourself featured
There are lots of bloggers out there who regularly do interviews with designer-makers. Sometimes they have a form to register your interest in being featured, sometimes they do a shout out on facebook asking for volunteers, and sometimes you just have to be brave and get in touch (the worst that can happen is that they say no!). It takes a little while to write thought through answers to the questions, but it may be time well spent. Check out the interviews on Handmade Harbour, The Crafty Network and Heart Handmade (and look out for say it featuring soon on at least one of these!).

Join a blog ring / link party
I had no idea what a blog ring was until a few weeks ago. Apparently they used to be popular 'back in the day'. The lovely Sarah from Merry Berry and the Little Panda has just set one up - find out more here.
You can also join in with link parties, where you leave a link to your blog and check out the other blogs that have been linked. It's a good way to both find new blogs to read yourself and get a few new visitors to your blog. I like Handmade Monday, but there are many to choose from.

And if you have a little money to spend...
I'm just beginning to think about spending some money on advertising. I had a trial with google adwords and whilst it brought lots of visitors I didn't get one sale from it, so have put that on hold. It's very expensive too - I had £55 to try out and it lasted about six weeks with two different ads running. For cheaper options try a Made it Flaunt it showcase (£5 per item per monthly showcase), UK Handmade showcase (£10 per showcase) or The Handmade Gift Guide (£2.95 per item for six weeks).
And if you have a local magazine or village newsletter it's worth contacting them to see how expensive their advertising is. My local one is pretty expensive, but my mum's one does small ads for 20p per word so I might give that a go.

Phew, I think that's everything! I can't guarantee that any of these will bring you visitors or sales. I'm monitoring google analytics closely to see which ones work for me - and maybe I'll write another post in a couple of months letting you know which ones brought the most traffic. EDIT - follow up post is here.

I'm sure this is only the tip of the iceberg and there are probably loads of great ways of advertising that I've not discovered yet. Feel free to comment if there are any you know of.

I'm linking this post to Handmade Monday. Hello to any readers who have popped in from there - I hope this was a useful post for you. If, having finished this post, you're in search of more interesting crafty blogs to read, why not pop over to Handmade Monday and see what else is linked.

Related Posts Plugin for WordPress, Blogger...