

Now we're going to think about actually taking the photo.

Get your camera out. You don't need a super dupa mega fancy camera, but I will say that a phone/tablet camera probably won't be sufficient. You'll need something with a few settings, but my very basic camera that I've had for years has everything I need. You don't need millions of megapixels either. The minimum is probably about 5 megapixels, which will give you good shots for your online shop. But you'll need a few more if you want to take hi res shots (required for magazines etc.).


Think about lighting. Take a walk around your house and find the room with the most natural light. Set up near a window, out of direct sunlight. Two rules - no artificial lights and absolutely no flash. Don't worry if it looks a little dull, it's amazing what you can do with a computer afterwards. I know a lot of people advise using a light tent if you want shots with a white background, but I've never used one and they're certainly not necessary.
Now take a look at your item set up waiting to be photographed and notice the shadows. Which way do they fall? How big are they? A little bit of shadow helps to give depth to the picture, but you really don't want too much. Great big shadows that are larger and darker than the product just detract from what you're trying to sell. Shadows aren't something we normally notice, but take a good look at them now. And move your item around until you are happy.

Hold your camera in place for the shot, then take a look at how close the lens is to your item. For large items you are likely to be a fair distance away, but for smaller items or close up shots you might only be a few centimeters from the product. These close up shots are likely to be out of focus unless you use your camera's macro settings.
Tracy from Cinnamon Jewellery explains:
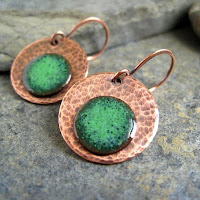 "Taking photos of jewellery means you have to get close up in order to show details so using the macro setting on your camera is essential. It's usually the button with the tulip symbol and will focus on small details when the camera is close to the item. My camera allows me to get very close to items, within 2 inches, so I can pick out a particular detail I want to show. It's worth reading your camera manual and experimenting with settings to get the best results. I found experimenting with the manual settings on my camera produced better all round results than using the auto setting."
Lastly, you want to make sure your camera doesn't move when you take the photo. Any movement, no matter how small, will make the photo look blurry and out of focus. It's important to have sharp product pictures so you need to fix the camera in place. If you have a tripod this is perfect. I have a mini tabletop one that I find quite useful. But you can achieve the same thing by sitting your camera on top of a couple of books. Just make sure that it is sat somewhere quite stable and not wobbling about in your hands.
If you've done this and you're still getting a little bit of blur, especially on the macro setting, then you could also try using the automatic timer setting so that you make sure you're not moving the camera when you press the button to take the photo.
Don't worry too much at this stage about what the photo looks like. This is one of my pictures that I still managed to turn into a decent product image:

If you're using a white background just make sure there is white all the way around the edge of the product. After that, anything else in the background (such as my craft mat and computer speakers!) can be edited out afterwards.
And speaking of editing, the third post in this series on photography looks at taking the raw images and using your computer to turn them into something beautiful.
Really useful info, thanks!
ReplyDeleteThanks for contributing to the post :-)
Delete